In this tutorial you’ll learn how to animate a mesh using a shader so it looks like it’s blowing in the wind.
Setting up the scene
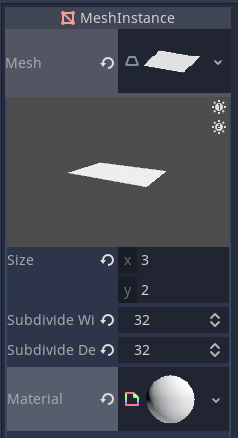
First off, create a new 3D scene and add a MeshInstance node as a child. Add a new PlaneMesh to it, change its size to have a 3:2 ratio and subdivide it into 32 by 32 subdivisions. We’ll need these vertices to deform the flag.
Add a new ShaderMaterial to the PlaneMesh. Your settings in the inspector should look like this.
Now, we’ll set up the shader and generate a noise texture.
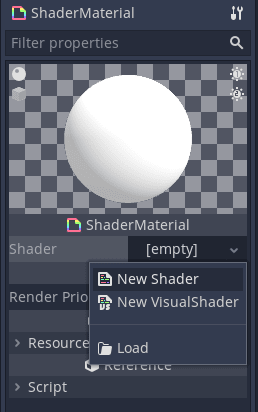
Click into the ShaderMaterial and a new shader to it to open up the shader code editor.
Writing the shader
We’re going to use OpenSimplexNoise to deform the mesh and get the fluid movement you might find on a flag. Set up the noise texture by first typing the following in the shader code editor.
shader_type spatial;

uniform sampler2D uv_offset_texture : hint_black;
The shader_type tells Godot what kind of shader it’s working with. We use spatial for 3D objects. The uniform uv_offset_texture is a parameter we can pass into the shader.
Add a new NoiseTexture from the inspector.
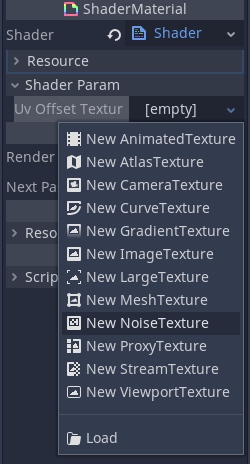
Click into it and create a new OpenSimplexNoise resource. Make sure Seamless is set to true so we don’t have obvious seams when the texture repeats.
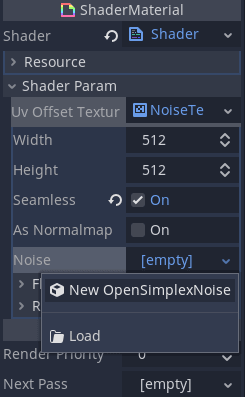
Now we have our noise texture, we can sample it in the shader. We do this in the vertex function which controls each vertex of the mesh.
We can take any of the color values as they’re the same due to the greyscale color of the texture. We take the red value at the point in the UV and change the position of the vertex by that amount.
void vertex(){
	float noise = texture(uv_offset_texture, UV).r;

	VERTEX.y += noise;
}
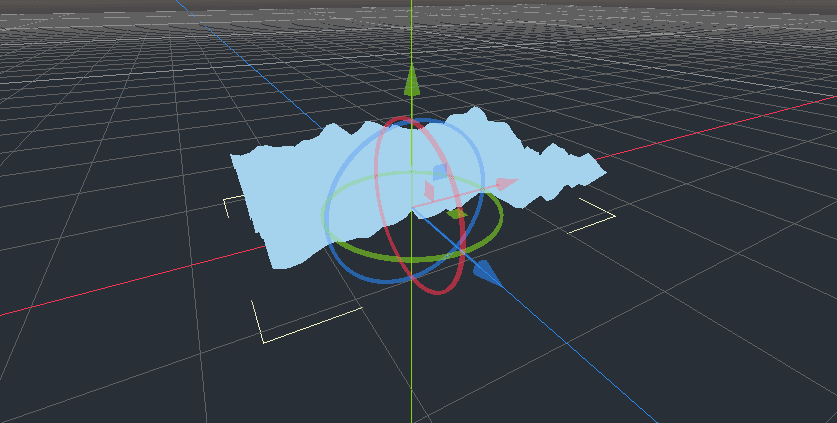
The flag is looking a bit rough and spiky so we’ll zoom in on the noise texture by a given scale to “stretch” it out. This will smooth the peaks and valleys.
uniform vec2 uv_offset_scale = vec2(-0.2, -0.1);
We use negative values here because the uv_scale_offset also controls which direction the flag flows. A negative x value will make it look like the wind is flowing from left to right.
Update the vertex function to take this into account.
void vertex(){
	vec2 base_uv_offset = UV * uv_offset_scale;

	float noise = texture(uv_offset_texture, base_uv_offset).r;

	VERTEX.y += noise;
}
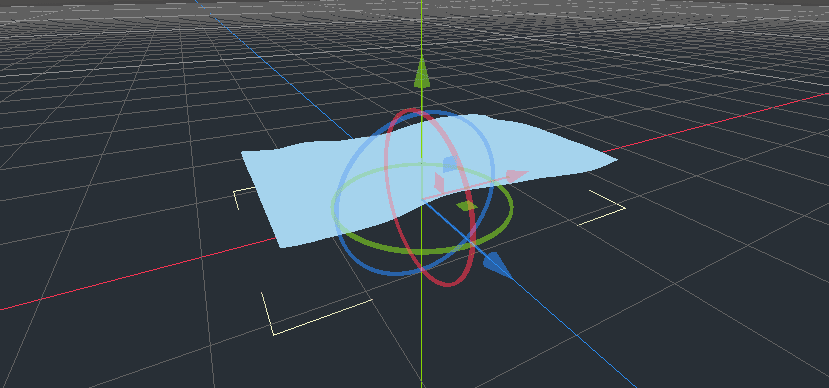
It’s looking softer but it needs movement!
We move along the texture by adding the in built TIME variable which tracks the elapsed time of the shader.
base_uv_offset += TIME;
Add a new uniform which will control the speed of the shifting texture.
uniform vec2 time_scale = vec2(0.3, 0.0);
We multiply the TIME by this scale.
void vertex(){
	vec2 base_uv_offset = UV * uv_offset_scale;
	base_uv_offset += TIME*time_scale;

	float noise = texture(uv_offset_texture, base_uv_offset).r;

	VERTEX.y += noise;
}
You may notice the flag looks like it’s hovering above the floor. This is because sampling the noise texture returns a value between 0.0 and 1.0. Let’s convert these values to values between -1.0 to 1.0 instead.
void vertex(){
	vec2 base_uv_offset = UV * uv_offset_scale;
	base_uv_offset += TIME*time_scale;

	float noise = texture(uv_offset_texture, base_uv_offset).r;
	// Convert from [0.0, 1.0] to [-1.0, 1.0]
	float texture_based_offset = noise * 2.0 - 1.0;

	VERTEX.y += texture_based_offset;
}
Flags are attached to something on one side so they don’t fly away in the wind. We’ll simulate this by applying dampening. We want our offset strength, or coefficient, to be 0.0 on the left and at full strength on the right. Conveniently, we can use the UV for this by multiplying texture_based_offset by UV.x.
texture_based_offset *= UV.x; // Apply dampening
Out flag movement looks quite good from this angle but if you look face on and set the camera to Orthogonal, the shape doesn’t change in the x or z axes.
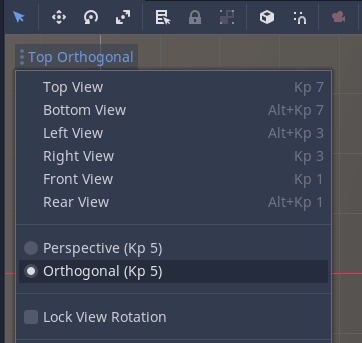
To fix this we’ll add face_distortion uniform which dictates how much we want the face to be warped, based on the sampled noise texture.
uniform float face_distortion = 0.5;
I negated the offset on the x axis to make it look like the flag conserves its area better.
VERTEX.z += texture_based_offset * face_distortion;
VERTEX.x += texture_based_offset * -face_distortion;
Here is the final vertex shader.
shader_type spatial;

uniform sampler2D uv_offset_texture : hint_black;
uniform vec2 uv_offset_scale = vec2(-0.2, -0.1);
uniform vec2 time_scale = vec2(0.3, 0.0);
uniform float face_distortion = 0.5;

void vertex(){
	vec2 base_uv_offset = UV * uv_offset_scale;
	base_uv_offset += TIME*time_scale;

	float noise = texture(uv_offset_texture, base_uv_offset).r;
	// Convert from 0.0 <=> 1.0 to -1.0 <=> 1.0
	float texture_based_offset = noise * 2.0 - 1.0;
	// Apply dampening
	texture_based_offset *= UV.x;

	VERTEX.y += texture_based_offset;
	// Distort the face to give impression of conserving shape
	VERTEX.z += texture_based_offset * face_distortion;
	VERTEX.x += texture_based_offset * -face_distortion;
}
Made by
Johnny Goss
Indie game developer and tutorial maker. Dungeon Master.

