Pixel art needs you to tweak a few settings to look right in Godot. By default, the engine is set up for smooth, modern graphics, which isn't what we want for that blocky, pixelated aesthetic.
To make your pixel art look crisp, you need to configure three main aspects: texture filtering, viewport scaling, and your base resolution. Get these wrong, and your carefully crafted pixel art will end up blurry or inconsistent, and lose all its charm.
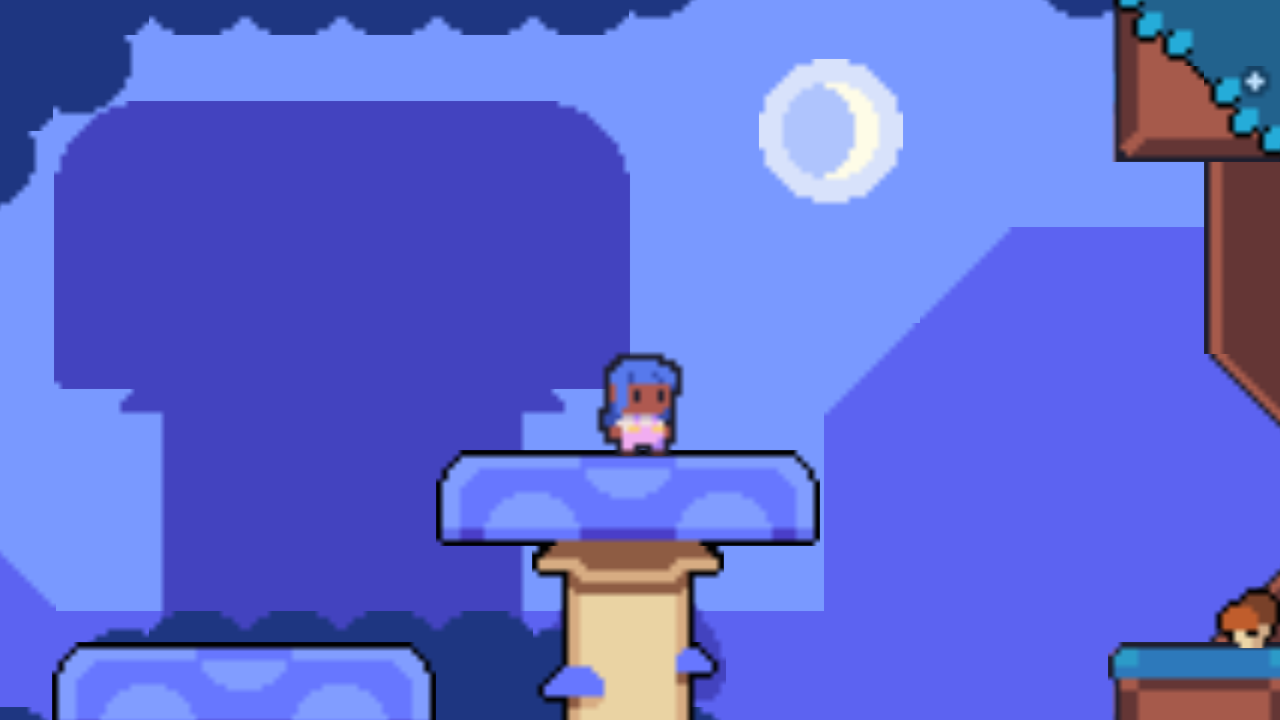
Poor Lucy's looks all sad and blurry because of Godot's default settings!
With pixel art, we're trying to capture the feel of classic games that rendered at small resolutions due to hardware limitations. It's all about those chunky, sharp pixels that give that unique retro vibe.
When you design pixel art, each pixel has a purpose. When scaling these assets up or down, you want to preserve those edges rather than blend them together, even on larger screens.
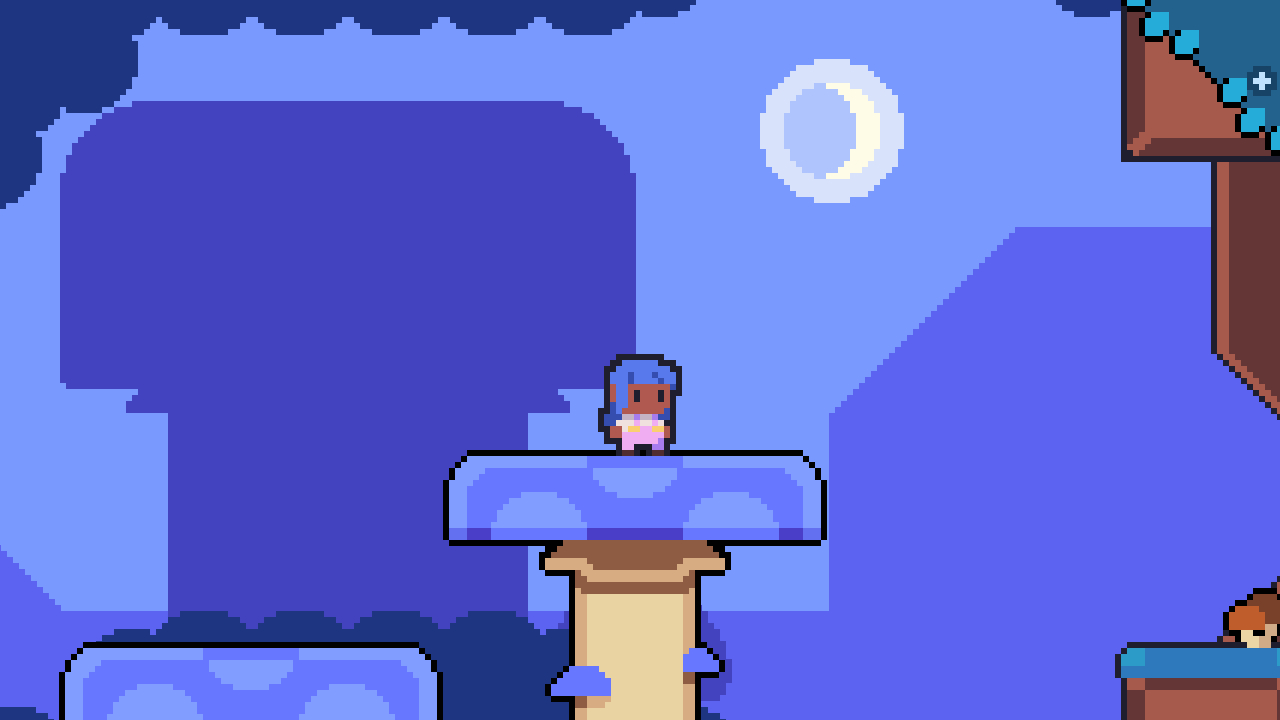
With the right settings, Lucy looks crisp.
In this guide, you'll learn:
How to change texture filtering for pixel art
How to pick the base resolution for your pixel art project
When to use viewport vs. canvas item scaling modes
How to enable integer scaling for consistent pixel sizes
This guide focuses on the main built-in settings you need to set up a pixel art project in Godot. These settings make it easy to get a good-looking pixel art game without writing any shader code or custom scripts.
Nathan
Founder and teacher at GDQuest
How to configure pixel art in Godot 4
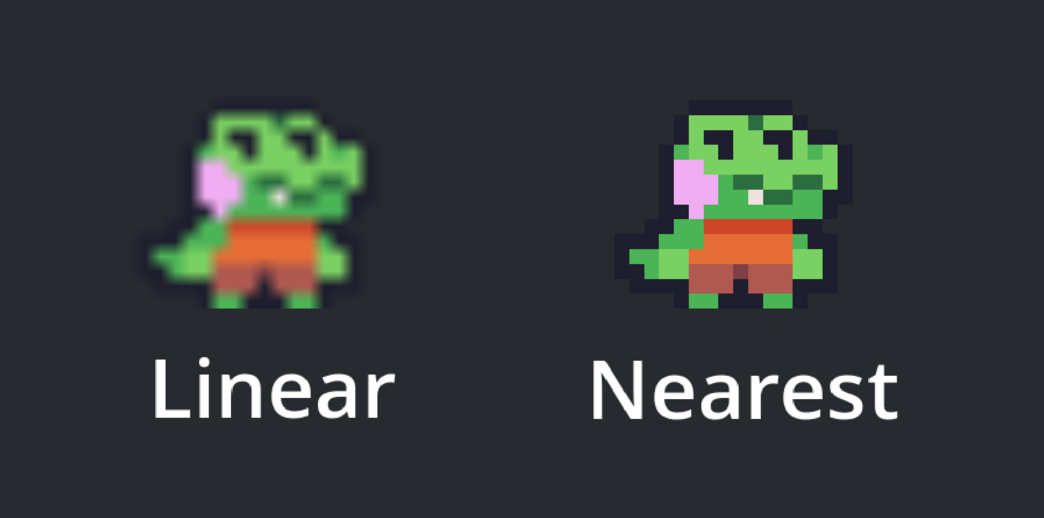
Godot's default texture settings use linear filtering, which smooths out pixels when they're scaled. This works great for high-definition graphics, but it's the enemy of pixel art because it blurs the edges we want to preserve.
For a pixel art project, you'll want to switch all your textures to use nearest neighbor filtering instead. This tells Godot to keep pixels sharp and blocky when scaling, rather than trying to blend them together.
Here's a side-by-side comparison of a character with linear vs. nearest neighbor filtering
You can set this globally in your project settings:
Go to ProjectProject Settings...
Turn on Advanced Settings at the top right of the window
Navigate to RenderingTextures
Set Default Texture Filter to Nearest (short for "Nearest Neighbor")
With this change, all your textures will use nearest neighbor filtering by default. If you need to, you can also set this on individual nodes by changing their TextureFilter property in the Inspector dock.
Picking your game's base resolution
The resolution you choose in your project settings determines the virtual canvas size for your game. It changes how coarse or dense your pixel grid is, which affects how your pixel art looks on screen.
Which resolution should you pick? There's no one-size-fits-all answer, as it depends on your specific art style and the size of your assets. Here are some guidelines to help you decide:
Start with the 16:9 aspect ratio: If you don't know what to pick, you generally can't go wrong with a 16 by 9 ratio as most modern displays use this aspect ratio or a similar one. So any resolution that fits this ratio approximately will work for pixel art: 320x180, 426x240, 568x320, 640x360, etc.
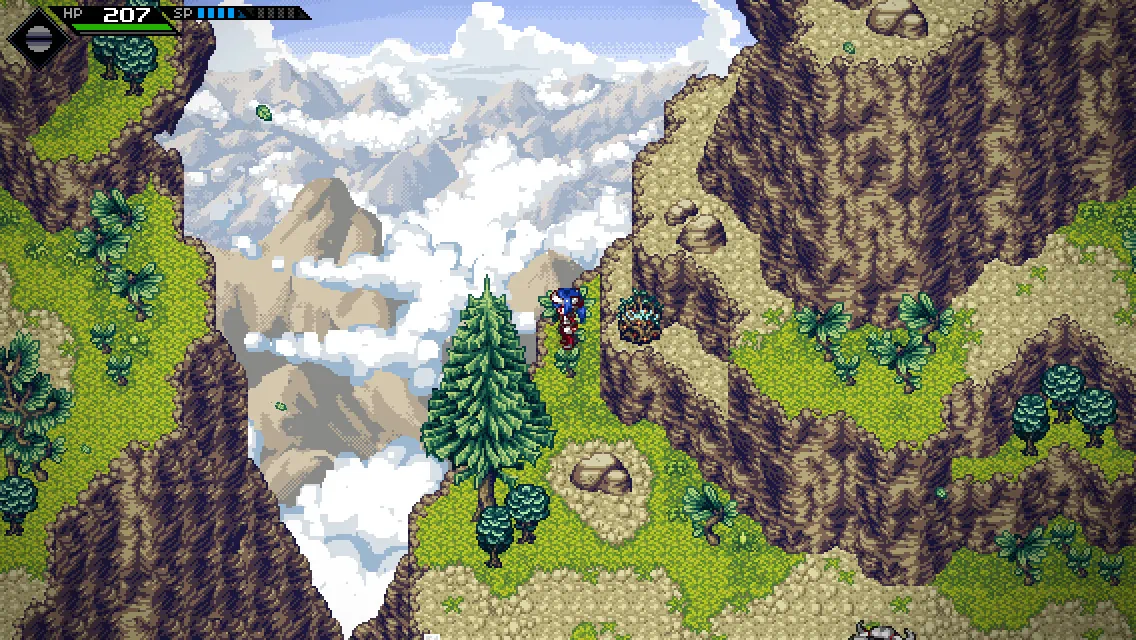
Use a reference: Look for a game that has an art style similar to the one you're going for and look up the base resolution they use. The detailed pixel art game CrossCode uses a base resolution of 568x320 for example.
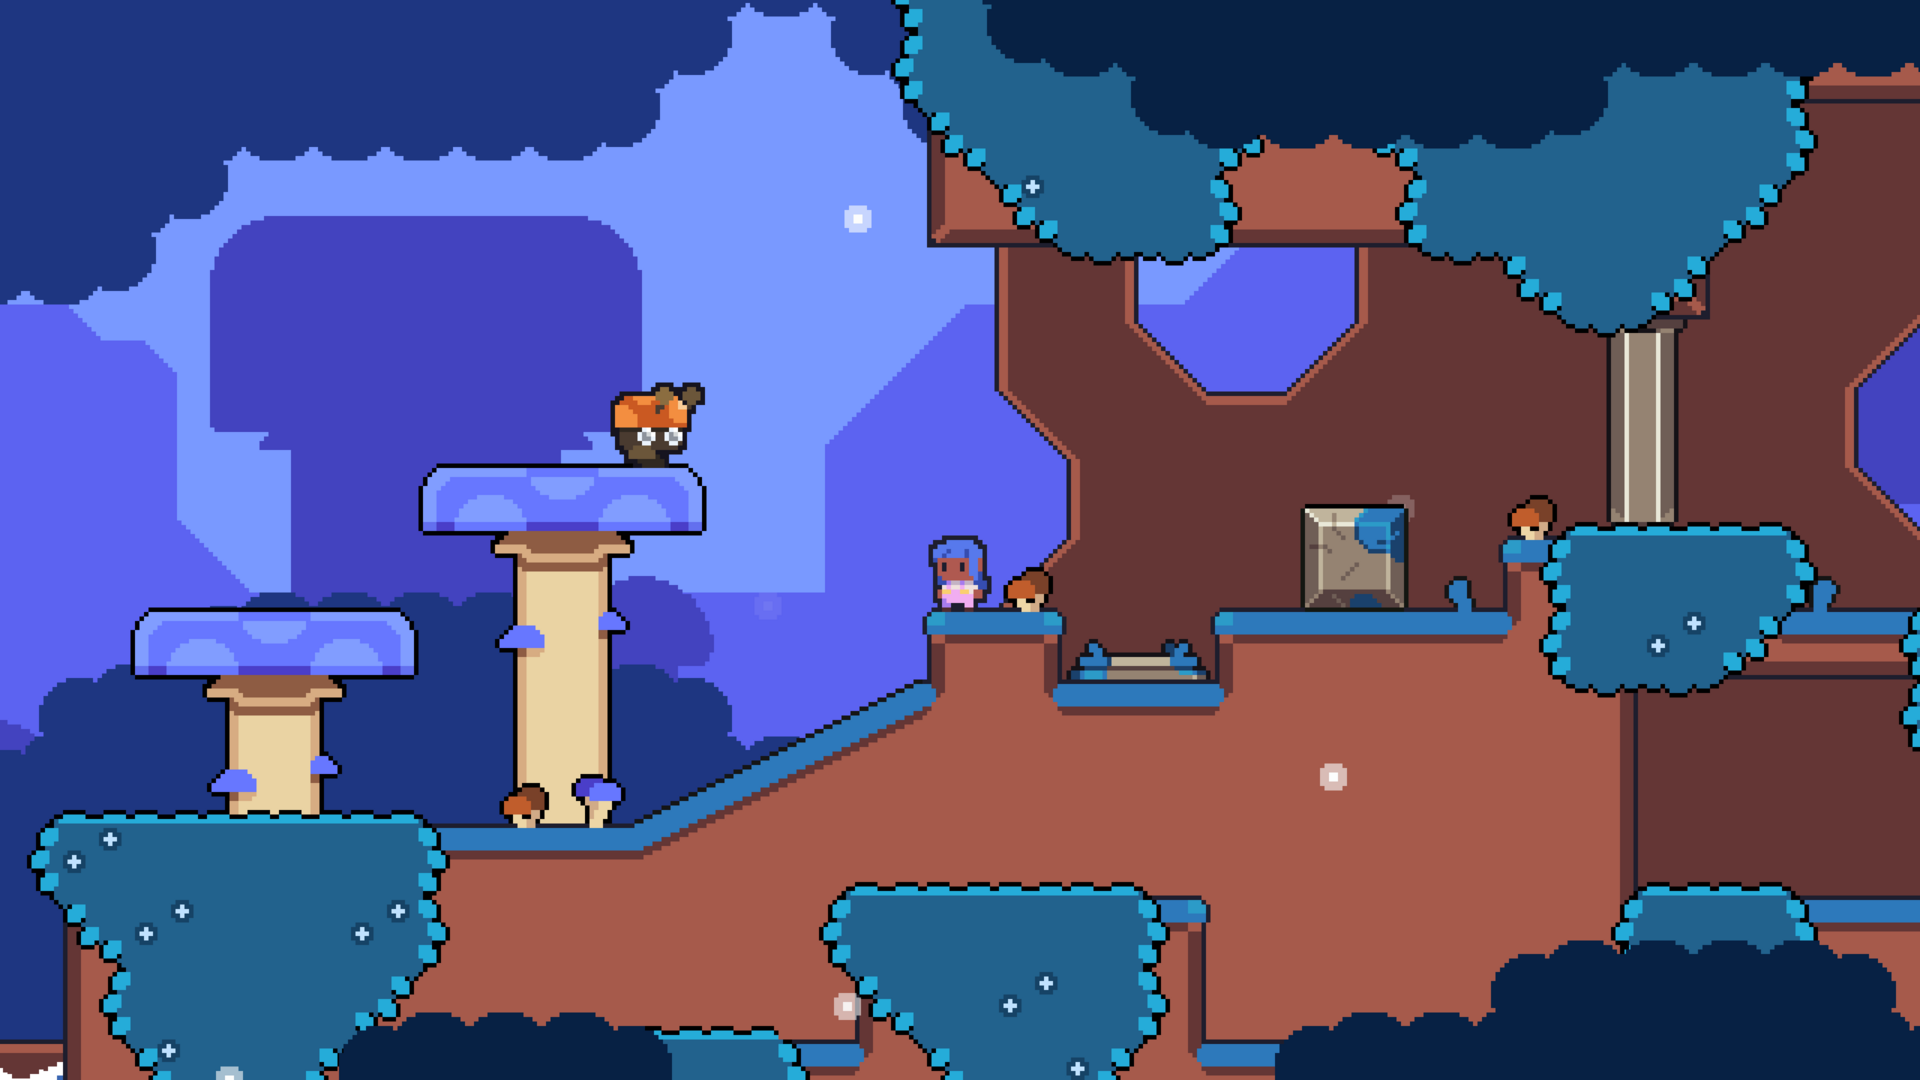
Match your character sizes: You'll usually start from the art and use your character as a measuring stick. For example, in Learn 2D Gamedev From Zero, Lucy is about 18 pixels tall and we want to have her be pretty small on the screen so we picked a resolution of 426 x 240, over 13 times her height.
This mountain range in CrossCode uses a base resolution of 568x320
This scene from Learn 2D Gamedev From Zero uses a base resolution of 426x240
Once you've picked the resolution, here's where to set it in Godot:
Go to ProjectProject Settings...
Navigate to DisplayWindow
Set SizeViewport Width and SizeViewport Height to your chosen resolution
Choosing your viewport scaling mode
Godot offers different ways to handle how your game scales from its base resolution to fit different screen sizes. For pixel art, you have two main approaches, each with its own strengths:
The viewport mode gives you that authentic low-resolution look. Your game actually renders at your chosen resolution (like 320x240), and then Godot scales that entire image up to fill the window. It gives you that classic retro feel where everything is equally pixelated: sprites, UI, everything.
The canvas item mode renders your game at the full window resolution, using your base resolution only as a reference. Your sprites will still look pixel-perfect, but the camera can move smoothly and you can have high-resolution effects like particle systems without breaking the pixel art aesthetic. Games like Hyper Light Drifter use this approach.
Here's how to set your scaling mode:
Go to ProjectProject Settings...
Navigate to DisplayWindow
Set StretchMode to either viewport or canvas_items
Avoid using tween animations and particle systems with the viewport mode
If you use the viewport mode, be careful with fluid animations like tweens and particle systems. They'll look very jagged because they're rendered at the low resolution of your viewport.
If you want to use these features, you'll want to favor the canvas item mode instead.
Integer scaling for pixel art
Since Godot 4.3, the engine has a handy feature called integer scaling. It constrains your game window to scale pixel art by whole numbers (2x, 3x, 4x) instead of decimal amounts (like 1.5x or 2.7x). This ensures your pixels always stay perfectly square and sharp, no matter the screen size.
When the game can't perfectly fit the screen with integer scaling, it adds black bars to preserve your pixel art's aspect ratio. This works especially well with the viewport scaling mode.
You can enable this in the DisplayWindow section of the project settings: change the Scale Mode to integer instead of fractional.